Chain Link Fence Installation on a Slope: How to Get It Right
Flat yards are rare in the Springfield area. Most lots here have at least some grade change, and a lot of them have the fence line running straight down a hill. Chain link fence installation on sloped ground is a different job than installation on level ground, and sloped chain link installation requires careful attention to detail to avoid gaps under the fabric, a wavy top line, or posts that have to come back out. This guide walks through the process step by step so you know what good work looks like, whether you are doing it yourself or watching a crew do it.
This matters even more if the fence is going on or near a property line. A fence that wanders off line because the installer was fighting the slope is a fence you may have to move. Get the layout and the grade handled correctly the first time and you avoid that whole headache.
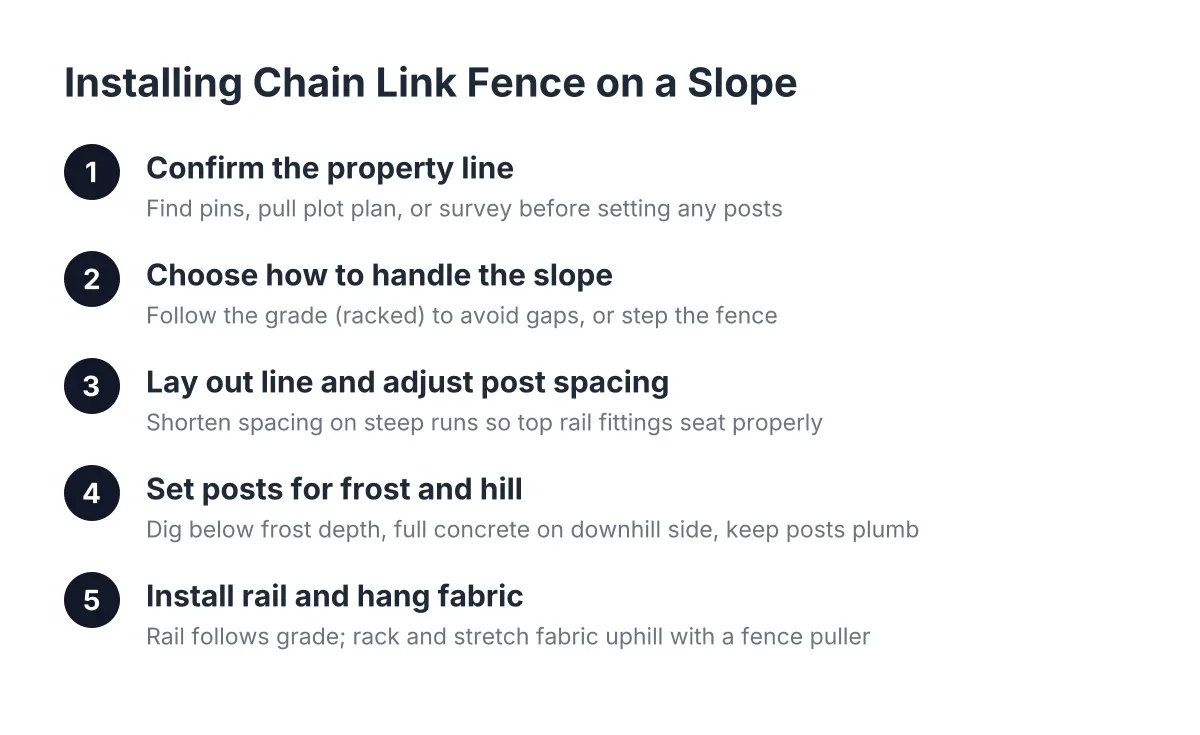
Step 1: Confirm the Property Line Before Anything Goes in the Ground
Before you set a single post, know exactly where your line is. On sloped lots this is harder than it sounds, because the pins may sit downhill in brush or fill, and old fences in older New England neighborhoods often drifted off the true line decades ago.
If you are fencing because of a neighbor dispute, a dog that keeps crossing into your yard, or a boundary question a realtor flagged, do not guess. Find your property pins, pull your plot plan, or hire a surveyor to mark the line. A survey costs money, but it costs far less than tearing out a fence and reinstalling it a few feet over.
A good fence company will ask about the line before quoting, and will set the fence slightly inside your boundary unless you have documented agreement with the neighbor. Keep whatever documentation you get. If the dispute ever escalates, a marked survey and a fence set inside your line puts you in a strong position without a lawyer.
One more note for 2026 planning: under the Massachusetts State Building Code (780 CMR), a fence over 7 feet tall requires a building permit, while fences 7 feet or less do not, according to the Town of Duxbury, MA. Most residential chain link runs well under that, but check with your local building department anyway, since Springfield-area towns can have their own setback rules.
Step 2: How to Handle Sloped Chain Link Installation
Chain link handles slopes better than almost any other fence type, which is one reason it stays popular for sloped Springfield-area lots. The fabric flexes, so it can rack to follow grade instead of stepping down in panels the way a wood fence or vinyl fence often must.
You have two basic approaches:
- Follow the grade (racked or contour method). The top rail runs parallel to the ground, rising and falling with the hill. The fabric racks to match. This keeps the bottom of the fence tight to the ground the whole way, which is the right call if the fence needs to contain a dog or keep a neighbor's dog out.
- Step the fence. Each section stays level, and the fence drops in steps as the grade falls. This looks tidy from the street but leaves triangular gaps under the fabric on each downhill section. A determined dog finds those gaps in about a day.
For the Boundary Dispute Homeowner whose main problem is animals crossing the line, follow the grade. Gaps defeat the purpose of the fence.
Step 3: Lay Out the Line and Adjust Post Spacing for the Grade
Run a string line between your corner and end points. A string line is the only reliable way to keep posts straight over a long run, and on a slope it also shows you where the grade changes direction.
Here is the part most DIY guides skip: on steep sections, standard post spacing does not work. Top rail sections are a fixed length, and when the rail has to travel downhill between two posts, the horizontal distance it covers shrinks. On steep slopes, full-length rails may not reach into the fittings if the posts sit at normal spacing. The fix is to shorten the post spacing on the steep runs so the rail seats properly.
Mark every post location along the string, then walk the line and look at each grade transition. Anywhere the slope changes sharply, plan a post at or near the break. The fence bends at posts, not between them, so a post at the grade change lets the top rail follow the hill cleanly instead of bridging over a dip or digging into a rise.
Step 4: Set the Posts for Frost and for the Hill
Western Massachusetts ground moves. Frost heave will push a shallow post out of the ground over a few winters, and on a slope the problem compounds because the downhill side of each hole has less soil holding the concrete. Dig below frost depth for this region, bell the bottom of the hole slightly if the soil is loose, and give the downhill side of each footing full concrete coverage.
On sloped grade, you will sometimes backfill one side of a post slightly higher than the other so the top rail can run at a consistent height as the ground rises and falls. That is normal. What matters is that every post is plumb; the ground tilts, the posts never do.
After the terminal posts (corners, ends, and gate posts) cure, run a string across the post tops before setting line posts. Driveways and other hard surfaces usually carry their own pitch, and a string line across the tops keeps the fence a consistent height above grade so it follows the surface uniformly instead of drifting taller and shorter as the ground changes.
Step 5: Install the Rail and Hang the Fabric on the Slope
With posts set, install the top rail so it follows the grade you planned in Step 2. Then stretch the fabric. On a slope, the mesh has to rack, meaning the diamonds shift out of square so the fabric can run parallel to an angled rail. Stand the roll at the downhill terminal post, attach it with a tension bar, then stretch uphill with a fence puller until the diamonds compress slightly under tension.
Next, tie the fabric to the framework. A few details that separate clean work from sloppy work:
- Use fence ties sized to the pipe diameter; ties come in different lengths for different post and rail sizes, and the wrong size either will not close or leaves the fabric loose.
- Where access allows, work from the side of the post opposite the mesh. It is a small thing, but it makes tying faster and keeps the fabric tight against the framework.
- Space ties evenly along the rail and down each line post so the fabric cannot sag between attachment points on the downhill runs.
Finally, walk the bottom of the line. On contoured installs, check for any spot where the fabric floats above a dip. Tension wire along the bottom, or a small amount of regrading at the low spots, closes those gaps.
When to Hire a Pro for Sloped Chain Link Installation
A straightforward slope on an open lot is a reasonable DIY project for a patient homeowner with a post-hole digger and a fence stretcher. However, some situations justify hiring a local fence company instead. Steep grades that need shortened post spacing, rocky Springfield-area soil, a contested property line, or a run that mixes slopes with retaining walls all raise the odds of an expensive do-over. The same is true if the fence placement itself is the dispute; an installer who documents placement relative to a marked survey protects you in a way a weekend install cannot.
Cost-wise, the slope itself is a cost factor. Shorter post spacing means more posts, more concrete, and more labor per foot, so expect a sloped run to price higher per foot than the same length on flat ground. For context, Angi reports overall fence installation costs average $3,277 nationally, with most homeowners paying between $1,860 and $4,843; a sloped chain link job can land anywhere in or around that band depending on length, height, and ground conditions. Get a fence estimate based on a walk of your actual line, not a satellite photo.
Suppose a new homeowner in East Springfield closes on a house with no fence, a backyard that drops several feet from the patio to the rear line, and a neighbor's dog that treats the yard as its own. In that scenario, the smart sequence is exactly the steps above: confirm the line, choose a contoured install so there are no gaps at the bottom, put posts at the grade breaks, and set everything below frost depth. Done in that order, the fence solves the dog problem and the boundary question in one project, and nobody has to dig up a post next spring.
If you need chain link fence installation, Western Mass Fence Co can help.
Related guide: chain link fence — Complete Guide
Prefer to talk it through? Call (413) 305-1309 — a quick call is usually the fastest way to get a straight answer for your situation.